

Posted by Barb N.P. Team
on August 17, 2025
Getting your lips done is exciting, but the secret to a fantastic result starts long before you're in the injector's chair. Proper preparation is everything. It’s what minimizes those annoying side effects like swelling and bruising and sets you up for the beautiful outcome you’re envisioning.
Think of it as a team effort between you and your injector. Your part begins in the days and weeks leading up to your appointment. By following a few simple guidelines, you’re creating the perfect canvas for your provider to work their magic.
Your Essential Lip Filler Pre-Care Checklist
This isn't just about showing up on time. Following a pre-care plan can dramatically improve your experience, making the procedure smoother and your recovery quicker.
This timeline breaks down exactly what you need to do and when.
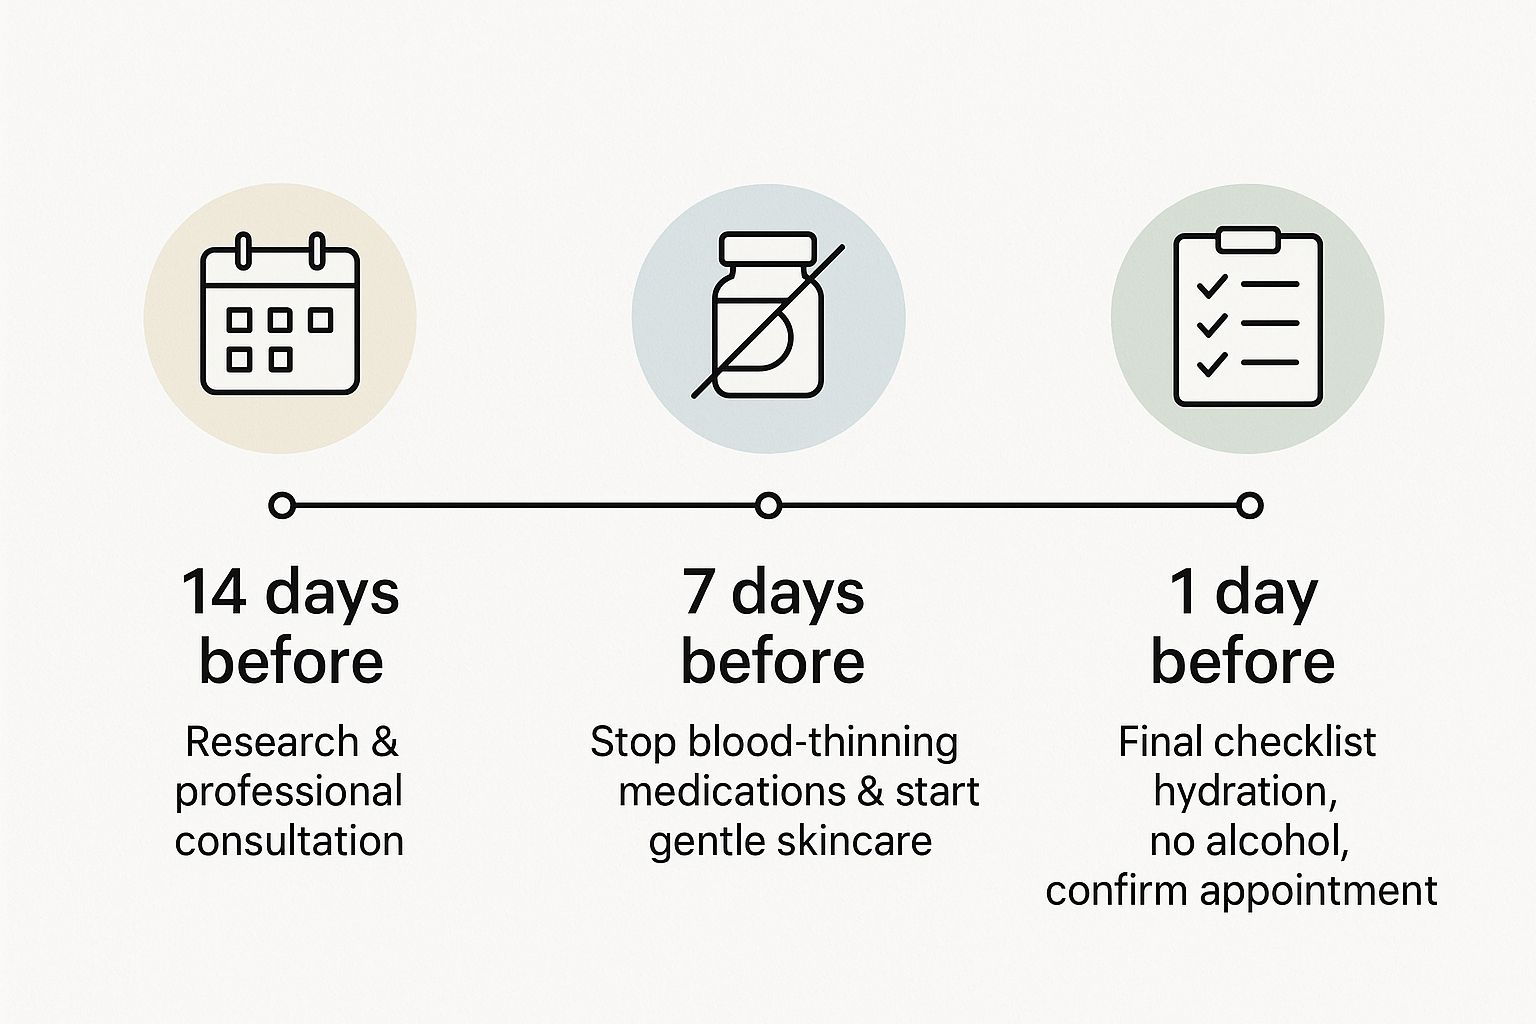
As you can see, a little planning goes a long way. Sticking to a schedule ensures you don't miss any critical steps that could affect your final look.
Planning For a Smooth Experience
A smart plan is your best defense against common side effects. Let's talk numbers: swelling can occur in up to 27% of filler treatments, while bruising affects roughly 25%-30% of patients. These figures show just how important it is to follow pre-care advice, like avoiding alcohol, intense workouts, and heavy sun exposure for at least 24–48 hours beforehand.
And since about 82% of lip fillers are temporary, building these good habits from your first appointment will set you up for continued success. If you're curious about how preparation influences safety and outcomes, you can dive into the latest industry research.
Expert Tip: The goal here is simple: reduce inflammation and minimize blood flow to the lips. When you do that, you drastically cut down the risk of significant bruising and help the filler settle in perfectly.
This isn't just about what to avoid—it's also about what you should be doing. Hydration is non-negotiable. Drinking plenty of water keeps your skin plump and responsive, which is exactly what we want.
You can also give your lips some extra love with a targeted treatment. Using a high-quality product like the BARB N.P. Hydrating Lip Complex in the weeks before your session is a game-changer. It ensures your lips are deeply moisturized and healthy, creating the ideal foundation for the filler to integrate beautifully. A nourished, hydrated surface makes the injection process more comfortable and contributes to a flawless final result.
To make it even easier, here's a quick reference guide to help you count down to your appointment.
Your Pre-Filler Countdown: A Quick Guide
This table summarizes the key actions to take at different intervals before your lip filler appointment. Following these simple steps can make a world of difference in your results and recovery.
| Timeframe Before Appointment | Key Actions and What to Avoid | Why It Matters |
|---|---|---|
| 2 Weeks Before | • Discontinue any non-essential blood-thinning supplements (e.g., Vitamin E, fish oil). • Start a daily lip hydration routine. • Confirm your appointment and ask any final questions. |
This reduces the risk of bruising by giving your blood plenty of time to return to its normal clotting ability. |
| 1 Week Before | • Avoid blood-thinning medications like Aspirin and Ibuprofen (consult your doctor first). • Pause topical retinoids or exfoliating acids around the mouth. |
This is the most critical window for minimizing bruising and swelling. It also prevents skin sensitivity in the treatment area. |
| 48 Hours Before | • Stop drinking alcohol. • Avoid waxing, tweezing, or bleaching the area. • Reschedule if you have a cold sore outbreak or skin infection. |
Alcohol thins the blood significantly, increasing bruise risk. Avoiding hair removal prevents irritation. |
| 24 Hours Before | • Skip intense exercise or anything that gets your blood pumping. • Drink plenty of water to stay fully hydrated. • Avoid salty foods that can increase swelling. |
This helps keep blood pressure stable and minimizes fluid retention, leading to a smoother procedure and recovery. |
Think of this table as your personal checklist for success. By being mindful in the days leading up, you're not just preparing your lips—you're investing in a better, more comfortable experience from start to finish.
Choosing the Right Injector for You

Let's be clear: the single most important decision you'll make when it comes to lip fillers is choosing your provider. This one choice impacts everything—your results, your safety, and your overall experience. A truly great injector is part artist, part medical expert, blending technical precision with a keen eye for aesthetic harmony.
Finding the right person is so much more than a quick Google search. It means doing your homework, vetting their credentials, and really looking at their work to make sure their style aligns with what you want for your face.
Verifying Credentials and Experience
First things first, you need to confirm your provider is a licensed and qualified medical professional, like a Nurse Practitioner (N.P.), Physician Assistant (P.A.), or doctor. Experience is absolutely non-negotiable. Don't be shy—ask how long they've been doing cosmetic injections and, more specifically, how often they perform lip augmentations.
The lip filler market has exploded, hitting a global value of around $1.39 billion in 2024 and projected to climb to $1.90 billion by 2032. With so many clinics and medspas out there, it’s more crucial than ever to do your research. A well-informed patient knows that hyaluronic acid fillers are the gold standard for a reason: they're safe, effective, and reversible. You can read more about the lip fillers market growth and trends to feel even more confident in your choices.
Analyzing Their Portfolio and Style
A picture is worth a thousand words, especially when it comes to aesthetics. When you're looking through an injector's before-and-after photos, get critical.
Pay close attention to these details:
- Consistency: Are their results consistently beautiful across different face shapes and lip structures?
- Natural Appearance: Do the "afters" look enhanced but not obviously "done"? Look for crisp, defined lip borders and balanced volume that complements the face.
- Variety: Does their portfolio show a range of outcomes, from subtle hydration to more dramatic volume? Or does everyone seem to leave with the exact same look?
This is how you find an injector whose artistic signature matches your personal goals. If you're dreaming of a soft, pillowy pout, you shouldn't book with a provider known for creating super-sharp, defined lips.
Key Takeaway: An injector's portfolio is their resume. You're looking for an artist who tailors their technique to the individual, not someone who uses a one-size-fits-all approach.
Mastering the Consultation
Think of your consultation as an interview—you're interviewing the provider just as much as they're assessing you. A great consultation should feel like a collaborative conversation, not a sales pitch. It’s where you build trust and establish clear, realistic expectations.
Come prepared with questions. This is your chance to make sure you're both on the same page. This principle applies to any aesthetic treatment; being prepared is everything, something we also highlight in our guide on how often you should get Botox. Asking the right questions upfront makes all the difference in getting—and maintaining—the results you truly want.
Foods, Supplements, and Meds to Skip Before Your Appointment
What you put in your body the week before your filler appointment has a huge impact on your results. I can't stress this enough. Some of the most common foods, supplements, and over-the-counter meds have blood-thinning properties that can turn a tiny needle poke into a noticeable bruise.
Think of it like this: your blood has little helpers called platelets that rush to the scene of any tiny trauma (like a filler needle) to plug the leak and prevent a bruise from forming under the skin. Blood thinners make these platelets less effective, meaning it takes them longer to do their job. This gives blood more time to seep out, leading to more swelling and darker bruising.
Pausing these items for a short time is one of the easiest and most effective things you can do to ensure a smooth, quick recovery.
Medications and Supplements to Put on Hold
This is a big one. Some of the most common culprits are hiding right in your medicine cabinet. While they’re fantastic for a headache, certain pain relievers can seriously interfere with your body’s clotting ability. It's best to avoid them for at least one week before we see you.
The same goes for a surprising number of popular health supplements. They might be great for your overall wellness, but many have a blood-thinning effect that works against you right before a filler treatment.
Here’s a quick list of what to pause:
- NSAIDs: This is your Aspirin, Ibuprofen (Advil, Motrin), and Naproxen (Aleve). If you need something for pain, Tylenol (acetaminophen) is a much safer bet.
- Fish Oil: Those Omega-3s are amazing for inflammation but are also potent blood thinners. Take a break for a week.
- Vitamin E: Another very common supplement that can increase your chances of bruising.
- Herbal Supplements: Be extra cautious with Ginkgo Biloba, Ginseng, St. John's Wort, and even high-dose Garlic supplements.
This isn't just friendly advice; it's backed by clinical experience. We consistently see that patients who stop blood-thinning agents at least a week before treatment have fewer complications. With temporary hyaluronic acid fillers making up over 80% of the market, proper prep is everything. If you're curious, you can learn more about the lip injection market dynamics and see why these steps are so critical for a great outcome.
What’s on the "Do Not Drink or Eat" List?
Now for the kitchen. Your diet in the days leading up to your appointment matters, too. For at least 48 hours before you come in, try to avoid anything that could thin your blood or kick up inflammation.
Alcohol is the number one offender. It’s a vasodilator, which is a fancy way of saying it opens up your blood vessels. More blood flow right under the skin is the last thing you want when you’re about to be injected with a needle—it's a recipe for bruising.
Also, consider putting these on pause:
- Green Tea: It’s healthy, but it has mild blood-thinning properties.
- Red Wine: This gets a special mention because, like all alcohol, it should be avoided. But it also contains tannins that can make bruising worse.
- Caffeine: A huge caffeine blast can slightly raise your blood pressure, which in turn can increase your risk of bruising. It's a good idea to limit your intake on the day of your treatment.
Being mindful of what you're consuming is an empowering step. It puts you in control, helping ensure your experience is as comfortable as possible so you can get back to showing off your gorgeous new lips faster.
How to Prep Your Skin and Lifestyle for Flawless Results
Think of your lips as the canvas and your injector as the artist. Just like a painter preps a canvas before creating a masterpiece, taking a few simple steps to prepare your skin can make a huge difference in your final results.
Healthy, hydrated skin doesn't just make the injection process smoother for your provider; it helps the filler settle in beautifully. Don't worry, this prep work isn't complicated. It's really just about being gentle with your skin and mindful of your habits in the 24-48 hours before you walk through our doors.
Your Pre-Filler Skincare Routine
In the week leading up to your appointment, the goal is simple: be kind to the skin around your mouth. This means hitting pause on any aggressive treatments that could leave your skin sensitive or irritated. An injector working on calm, healthy skin can always achieve more precise and comfortable results.
Here’s what you’ll want to temporarily shelve:
- Harsh Exfoliants: Hold off on chemical peels, strong scrubs, and microdermabrasion near your mouth.
- Retinoids: Pause any prescription or over-the-counter products with retinol, tretinoin, or adapalene on or around your lips.
- Hair Removal: Avoid waxing, threading, or using depilatory creams on your upper lip for at least two days beforehand.
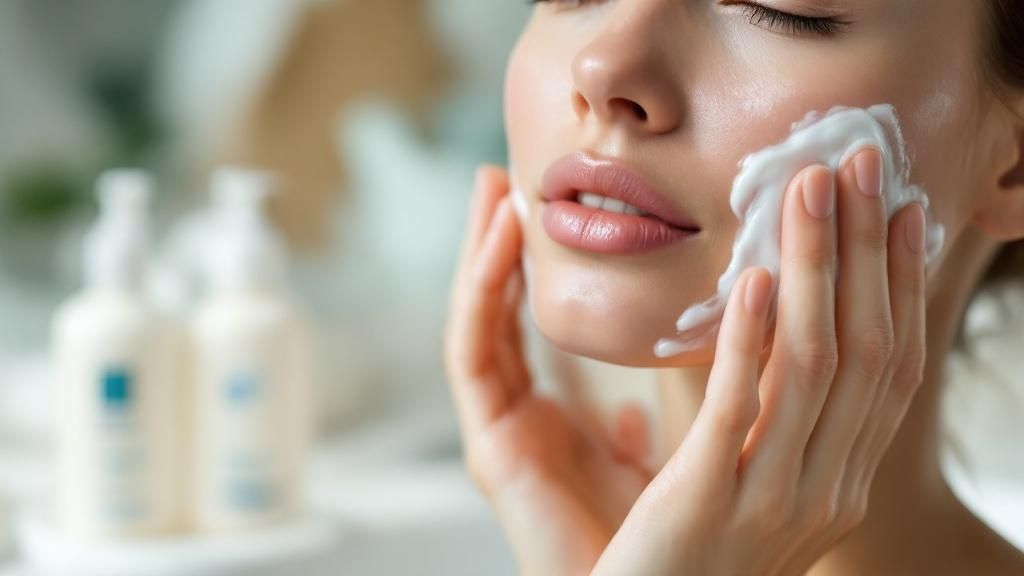
Instead, your focus should be on gentle cleansing and deep hydration. A great cleanser, like the BARB N.P. Purifying Gel Cleanser, is foundational—it gets rid of impurities without stripping away the moisture your skin needs to be healthy. If you're curious, you can learn more about what are the benefits of using a cleanser and see why this one step is so vital for overall skin health.
The Power of Lip Hydration
Showing up to your appointment with dry, chapped lips is a real missed opportunity. When your lip tissue is well-hydrated, it creates the perfect environment for the filler to integrate smoothly. It can even make the injections feel more comfortable.
This is where a targeted lip treatment becomes your secret weapon.
Pro Tip: Start a dedicated lip hydration routine at least a week before your appointment. Consistently applying a nourishing product creates supple, resilient skin, which is the perfect foundation for filler.
We highly recommend incorporating the BARB N.P. Hydrating Lip Complex into your daily routine. Its formula was specifically designed to deeply moisturize and condition the delicate skin on your lips. Using it twice a day for the week leading up to your treatment will get your lips in peak condition, creating that ideal canvas for your injector.
Small Lifestyle Changes, Big Impact
Beyond skincare, a few minor tweaks to your daily routine can set you up for a fantastic outcome. These steps are all about keeping your body calm and reducing anything that might contribute to extra swelling or bruising.
In the 24-48 hours before you see us, be sure to:
- Stay Hydrated: This one is non-negotiable. Drinking plenty of water keeps your skin plump and resilient from the inside out.
- Avoid Intense Workouts: High-intensity exercise gets your blood flowing, which can increase the risk of bruising. Swap that strenuous gym session for a gentle walk the day before and the day of your appointment.
- Protect Your Skin from the Sun: Sunburn is just another word for skin inflammation. Make sure you avoid direct, prolonged sun exposure so the treatment area isn't irritated before we even begin.
By taking these simple, actionable steps, you’re playing an active role in your own results. You're not just preparing for an appointment; you're investing in a smoother procedure and the gorgeous outcome you deserve.
Getting Ready for Appointment Day
The day of your lip filler appointment is finally here. It's totally normal to feel a mix of excitement and a few last-minute butterflies. The best way to calm those nerves? Knowing exactly what to expect from the moment you walk in.
Think of it this way: the physical prep is done. Now, it's all about getting mentally and logistically ready so you can walk into your appointment feeling relaxed, confident, and excited for your results.

What to Expect During the Procedure
First things first, you’ll arrive with a clean, makeup-free face. Even so, your injector will cleanse the area again to make sure everything is perfectly sterile.
Next up is the numbing cream. A topical anesthetic will be applied to your lips and the skin around them. You'll relax for about 20-30 minutes while it works its magic. This step is a game-changer for minimizing any discomfort.
Once you're numb, the actual injections begin. People are often surprised by how quick this part is—usually just 15-30 minutes. Most modern hyaluronic acid fillers, like the ones we use, also contain lidocaine. This numbs the area from the inside as it's injected, making the whole experience much more comfortable.
You’ll feel a bit of pressure and a series of small pinches, but it’s generally very easy to tolerate. Your injector will likely pause to gently massage the area, expertly shaping the filler for a beautiful, natural result.
Immediately after, your lips will look full—probably a bit fuller than you expected! This is due to initial swelling, and it's a completely normal part of the process.
Plan Your Post-Appointment Downtime
A little planning goes a long way for a smooth, stress-free recovery. While you can get back to most of your daily routine right away, scheduling some social downtime is a smart move.
Swelling is just your body's natural response to the treatment. It’s most noticeable in the first 24 to 72 hours, so try not to book your appointment right before a wedding or a big presentation. Giving yourself at least a week allows any swelling and potential bruising to fade away completely.
Having a few recovery essentials ready at home before you leave for your appointment will make everything that much easier.
Here's what I recommend having on hand:
- Ice Packs: A soft gel ice pack or two in the freezer is perfect. Applying gentle cold compresses helps keep swelling in check.
- Hydrating Lip Care: A soothing, high-quality lip treatment is a must. The BARB N.P. Hydrating Lip Complex is fantastic for keeping your newly enhanced lips comfortable and moisturized.
- Healthy Snacks: Think soft, easy-to-eat foods. Smoothies, yogurt, and soup are great choices that don’t require you to stretch your mouth.
- Elevated Pillows: Sleeping with your head propped up on an extra pillow for the first couple of nights can make a big difference in reducing morning swelling.
This kind of preparation is great for any injectable treatment. In fact, many of these tips overlap with our guide on preparing for Botox. When you're prepared, you can just sit back, relax, and get ready to enjoy your beautiful new look.
A Few Final Questions Before Your Appointment
Even with a detailed prep plan, it's completely normal to have a few last-minute questions swirling in your mind. My goal is to make sure you walk into your appointment feeling excited and completely at ease, not anxious.
Let's clear up some of the most common things clients ask about before getting their lips done.
Can I Wear Makeup to My Lip Filler Appointment?
It’s always best to arrive with a fresh, clean face—especially around the mouth. Your injector needs a sterile canvas to work on, which is key to minimizing any risk of infection.
While we can always remove any makeup you have on, coming in bare-faced just saves time and helps us get started right away. This also means skipping lip balms or glosses unless we've specifically told you otherwise.
Key Insight: A clean canvas isn't just a suggestion; it's a non-negotiable part of a safe procedure. Arriving makeup-free helps your appointment run smoothly and shows you're an active partner in your own great results.
Think of it as the very first step of your treatment.
What if I Get Cold Sores?
This is an incredibly important point, and something you absolutely must bring up during your consultation. Lip filler injections create tiny punctures in the skin, which can sometimes trigger a cold sore outbreak (herpes simplex virus) if you’re prone to them.
Don't worry, this is very manageable. If you have a history of cold sores, your provider will likely prescribe an antiviral medication like Valtrex. You'll usually start it a day or two before your appointment and continue for a few days after. It’s a simple, highly effective preventative step that dramatically reduces the chance of a flare-up.
How Much Downtime Should I Plan For?
Many people get right back to their normal routine, but planning for a little bit of social downtime is a smart move. Swelling and bruising are completely normal and are usually most noticeable for the first 24 to 72 hours.
My best advice? Don't schedule your appointment right before a big event like a wedding, a photo shoot, or an important presentation. Give yourself at least a week, and ideally two, for any swelling and bruising to fully disappear. This buffer zone lets the filler settle into its final, beautiful shape without you feeling rushed or self-conscious.
How Much Does It Hurt to Get Lip Fillers?
This is probably the biggest question people have, and the answer is usually a pleasant surprise. Most of my clients report feeling a bit of pressure or a quick pinch, but not intense pain. The experience is far more comfortable than you might imagine.
There are a couple of reasons for this:
- Topical Numbing: First, we'll apply a strong topical numbing cream to your lips and let it sit for about 20-30 minutes. This makes a huge difference.
- Built-in Anesthetic: The best modern hyaluronic acid fillers, like those from the Juvederm and Restylane lines, already have lidocaine (a numbing agent) mixed right into the gel.
This dual approach means the area is numbed from the outside before we even begin, and then it’s numbed from the inside as the filler is placed. It's a combination that keeps discomfort at a minimum from start to finish.
At BARB N.P., I believe that a beautiful result starts with great preparation and open communication. If any other questions pop up, or if you're ready to book your consultation, you can explore all your options at https://barbnp.shop.